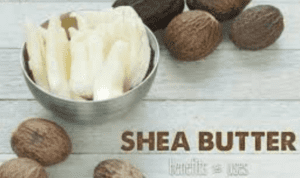
Shea butter is a long known remedy for stunted hair. It prevents hair loss by softening even the toughest hairs and also plays a major role in hair growth. If you’re growing your natural hair or your baby’s and you’re always struggling to comb it, just a touch of Shea butter can soften the hair making it appear silky and easy to comb.
This amazing cream has also attributed to skin beauty. It’s natural with no side effects but rather heals your skin from other product’s side effects. Shea butter contains fat extracted from the shea tree nut which is saturated with natural vitamins. Pure, unrefined shea butter helps in alleviating numerous skin and health issues such as stains and wrinkles, stretch marks during pregnancy, muscle fatigue, dermatitis and so on. It also protects your skin from ultraviolet radiation (SPF-6) and enriches the skin with essential fatty acids and elements necessary for the production of collagen.
People often buy this product from stores or market but it’s hard to find unadulterated ones these days. The best way to be sure is by making it yourself, at home. This way not only ensures quality but saves you the stress and cost of going out to buy one.
How To Make Shea butter At Home
You can easily make shea butter cream from Shea butter tree which grows naturally in the dry Savannah region of West Africa. There are two major ways of making shea butter:
- You can make a cream by heating shea butter until it melts then adding the oils, or
- you can do it following a no-heat method, which is much better for saving the natural benefits of shea butter.
- Heating Method
What you will need:
- Large saucepan
- Electric mixer
- Heat-proof glass bowl and large mixing bowl
- Ice
- 3/4 cup shea butter
- 1/2 cup of base oil (sweet almond, grapeseed, for example)
- 6 to 10 drops essential oils
- 1 teaspoon of cornstarch (optional);
Procedure:
- Fill the pan with water and boil over low heat.
- Add shea butter into the smaller glass bowl and place it in boiling water.
- Heat it until the butter melts and becomes liquid. Mix the base oils with the melted shea butter while continuing to heat the mixture over low heat for 10 minutes.
- Fill a large bowl with ice cubes. Remove the first bowl from the hot water and let it cool slightly before putting it in the bowl of ice.
- Then, stir in essential oils and cornstarch if you need to.
- Place a bowl with the mixture in the ice and whip the shea butter and oil mixture on high speed with an electric mixer for about 15 to 30 minutes.
- Stop beating butter when it reaches the consistency of whipped cream. Place it in clean jars. Keep the whipped cream in the fridge so that you can enjoy it for up to three months.
- No-heat Method
What you will need:
- Electric mixer
- Clean container or a jar
- A fork
- Measuring cups and spoons
- 1/2 cup of unrefined shea butter
- 2 tablespoons of base oil; it can be argan oil
- 10-20 drops essential oil (optional), you can use lavender oil.
Procedure:
- Mash your shea butter with a fork until it becomes soft.
- Add the base oil, and mash it a little bit more, until the fluid becomes consistent.
- Then, mix it with the Electric mixer for about 10 minutes, it will make the mixture fluffy just like whipped cream.
- If you want to add an essential oil, pour it during mixing/whipping. The more you mix, the fluffier it becomes.
- Transfer it to a clean jar or a container and store in a refrigerator, it will help to save your cream for a long time.